Alright folks, let’s talk about something crucial—how to test electrical wires safely and effectively. Whether you're a beginner who just picked up a multimeter or someone who’s been tinkering around with circuits, testing electrical wires is a skill you need to master. This guide will walk you through everything you need to know, step by step, so you can do it like a pro without frying yourself in the process.
Let’s be honest here—electricity is not something to play around with. A single mistake can lead to serious consequences, from minor shocks to full-blown fires. But don’t panic! With the right knowledge and tools, testing electrical wires becomes a breeze. And hey, who doesn’t love feeling like MacGyver when they fix something on their own?
This guide is designed for beginners, so even if you’re completely new to the world of electrical wiring, you’ll find everything you need right here. We’ll cover the basics, safety tips, tools you’ll need, and step-by-step instructions on how to test electrical wires. Let’s dive in!
Table of Contents
- Why Test Electrical Wires?
- Tools You Need to Test Electrical Wires
- Safety First: Tips Before You Start
- How to Test Electrical Wires
- Common Mistakes to Avoid
- Troubleshooting Electrical Issues
- Understanding Voltage and Current
- When to Call an Electrician
- Resources for Further Learning
- Conclusion: Take Control of Your Wiring
Why Test Electrical Wires?
So, why exactly do you need to test electrical wires anyway? Well, my friend, there are a couple of reasons. First, it’s all about safety. If you’re working on a project that involves electrical wiring, you need to know whether the wires are live or not. A live wire can zap you in a heartbeat, and nobody wants that.
Second, testing electrical wires helps you identify issues early. Maybe a wire is damaged, or there’s a short circuit somewhere. Catching these problems early can save you a lot of headaches—and money—in the long run. Plus, it’s just good practice to know what’s going on behind your walls.
And let’s not forget the peace of mind factor. Once you’ve tested everything and made sure it’s safe, you can sleep better at night knowing your home’s electrical system is in good shape.
Tools You Need to Test Electrical Wires
Alright, before we get into the nitty-gritty, let’s talk about the tools you’ll need. You don’t need a fancy toolkit to test electrical wires, but there are a few essentials that will make your life a lot easier.
Must-Have Tools
- Multimeter: This is your go-to tool for testing electrical wires. It can measure voltage, current, and resistance. Make sure you get a digital multimeter—it’s way easier to read than the old analog ones.
- Voltage Tester: A non-contact voltage tester is a handy tool for quickly checking if a wire is live. Just wave it near the wire, and it’ll light up or beep if there’s voltage present.
- Wire Strippers: You’ll need these to strip the insulation off the wires when necessary.
- Insulated Screwdrivers: These have plastic handles to protect you from shocks. Always use insulated tools when working with electricity.
- Gloves: Get some insulated gloves. They might feel a bit bulky, but they’re worth it if something goes wrong.
Having the right tools is half the battle. Trust me, trying to test electrical wires without a multimeter is like trying to bake a cake without an oven—it’s just not gonna work.
Safety First: Tips Before You Start
Now, let’s talk about safety. This is the most important part of testing electrical wires. You don’t want to end up on the wrong end of a shock, do you?
Here are some safety tips to keep in mind:
- Turn off the power at the breaker box before you start. Double-check with a voltage tester to make sure the circuit is dead.
- Wear insulated gloves and shoes. Yeah, it might feel a bit weird, but it’s better to be safe than sorry.
- Use insulated tools. These are designed to protect you from shocks, so don’t skimp on them.
- Work in a dry area. Water and electricity don’t mix, so make sure everything is bone-dry before you start.
- Stay focused. Distractions can lead to mistakes, and mistakes with electricity can be dangerous.
Remember, safety is not optional. If you’re ever unsure about something, stop and double-check. It’s better to take a few extra minutes than to rush and make a costly mistake.
How to Test Electrical Wires
Now that you’ve got your tools and safety gear ready, let’s get into the actual process of testing electrical wires. It’s not as complicated as it sounds, I promise.
Step 1: Turn Off the Power
This is the first and most important step. Go to your breaker box and turn off the power to the circuit you’re working on. Then, use a voltage tester to double-check that the circuit is indeed dead. You don’t want to skip this step—it could save your life.
Step 2: Set Up Your Multimeter
Next, grab your multimeter and set it to the appropriate setting. If you’re testing for voltage, set it to the voltage setting. If you’re testing for resistance, set it to the ohms setting. Make sure you understand what each setting does before you start.
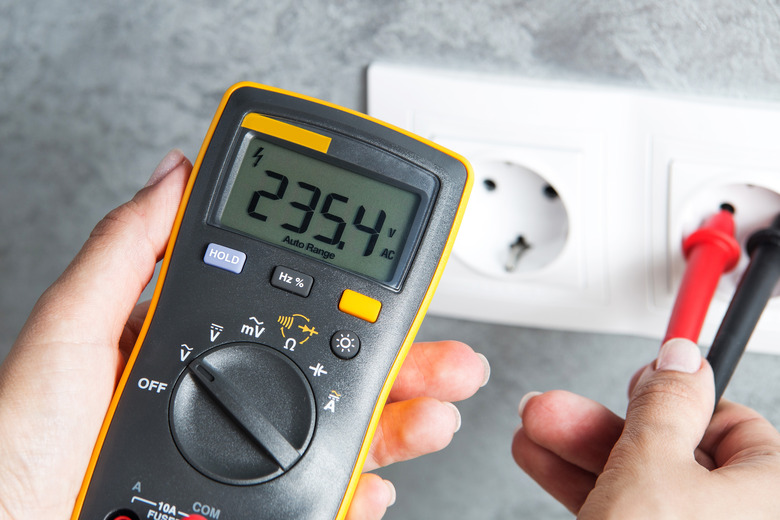
Step 3: Test the Wires
Now it’s time to test the wires. Touch the probes of your multimeter to the ends of the wires you want to test. If you’re testing for voltage, you should see a reading on the multimeter’s display. If you’re testing for resistance, you’ll see a different reading.
Here’s a quick breakdown:
- Voltage: If the wire is live, you’ll see a voltage reading. If it’s dead, the reading will be zero.
- Resistance: If the wire is intact, you’ll see a low resistance reading. If the wire is broken or damaged, the resistance will be high or infinite.
Once you’ve got your readings, you can move on to the next step.
Common Mistakes to Avoid
Even the best of us make mistakes sometimes, but with electricity, those mistakes can be costly. Here are a few common mistakes to avoid when testing electrical wires:
- Not Turning Off the Power: This is the biggest mistake you can make. Always turn off the power at the breaker box before you start.
- Using Damaged Tools: If your multimeter or voltage tester is damaged, it might not give you accurate readings. Replace any damaged tools immediately.
- Not Wearing Safety Gear: Gloves, insulated tools, and proper footwear are not optional. Wear them every time you work with electricity.
- Assuming Everything is Safe: Even if you’ve turned off the power, always double-check with a voltage tester before you start working.
By avoiding these common mistakes, you’ll be much safer and more efficient when testing electrical wires.
Troubleshooting Electrical Issues
Sometimes, things don’t go as planned. If you’re having trouble with your electrical wires, here are a few troubleshooting tips:
- No Voltage Reading: If you’re not getting a voltage reading, double-check that the power is on and that your multimeter is working properly.
- High Resistance: If you’re getting a high resistance reading, the wire might be damaged or broken. Inspect it closely for any signs of wear or tear.
- Inconsistent Readings: If your readings are all over the place, there might be a problem with the circuit. Check the connections and make sure everything is secure.
Troubleshooting can be frustrating, but with a little patience and persistence, you’ll get to the bottom of it.
Understanding Voltage and Current
Let’s take a quick detour to talk about voltage and current. Understanding these concepts will help you make sense of your multimeter readings.
Voltage is the pressure that pushes electric current through a circuit. Think of it like water pressure in a pipe. The higher the voltage, the more pressure there is.
Current, on the other hand, is the flow of electric charge through a circuit. It’s like the amount of water flowing through the pipe. The more current, the more electricity is being used.
Knowing the difference between voltage and current will help you interpret your multimeter readings more accurately.
When to Call an Electrician
Let’s be real here—there are some jobs that are just better left to the professionals. If you’re dealing with complex electrical systems or if you’re just not comfortable working with electricity, it’s time to call an electrician.
Here are a few signs that it’s time to call in the pros:
- Complex Wiring: If the wiring is more complicated than you anticipated, it’s better to leave it to someone who knows what they’re doing.
- Frequent Issues: If you’re constantly having problems with your electrical system, it might be time to get a professional opinion.
- Safety Concerns: If you’re ever unsure about something or if you feel unsafe, don’t hesitate to call an electrician.
Remember, it’s always better to be safe than sorry.
Resources for Further Learning
If you want to learn more about testing electrical wires, there are plenty of resources available. Here are a few to get you started:
- Electrical Engineering Courses: Platforms like Coursera and Udemy offer courses on electrical engineering that can help you deepen your knowledge.
- YouTube Tutorials: There are tons of tutorials on YouTube that can walk you through the process of testing electrical wires.
- Books: If you prefer the old-school approach, there are plenty of books on electrical wiring and testing that can provide in-depth information.
Keep learning and improving your skills, and you’ll be an expert in no time.
Conclusion: Take Control of Your Wiring
Well, there you have it—a comprehensive guide on how to test electrical wires for beginners. By now, you should feel confident enough to tackle basic electrical testing tasks on your own. Remember, safety is key, so always take the necessary precautions before you start.
If you found this guide helpful, don’t forget to share it with your friends and family. And if you have any questions or comments, feel free to drop them below. Let’s keep the conversation going and help each other become better at DIY electrical work.
So, what are you waiting for? Grab your multimeter, put on your gloves, and get to work. You’ve got this!